
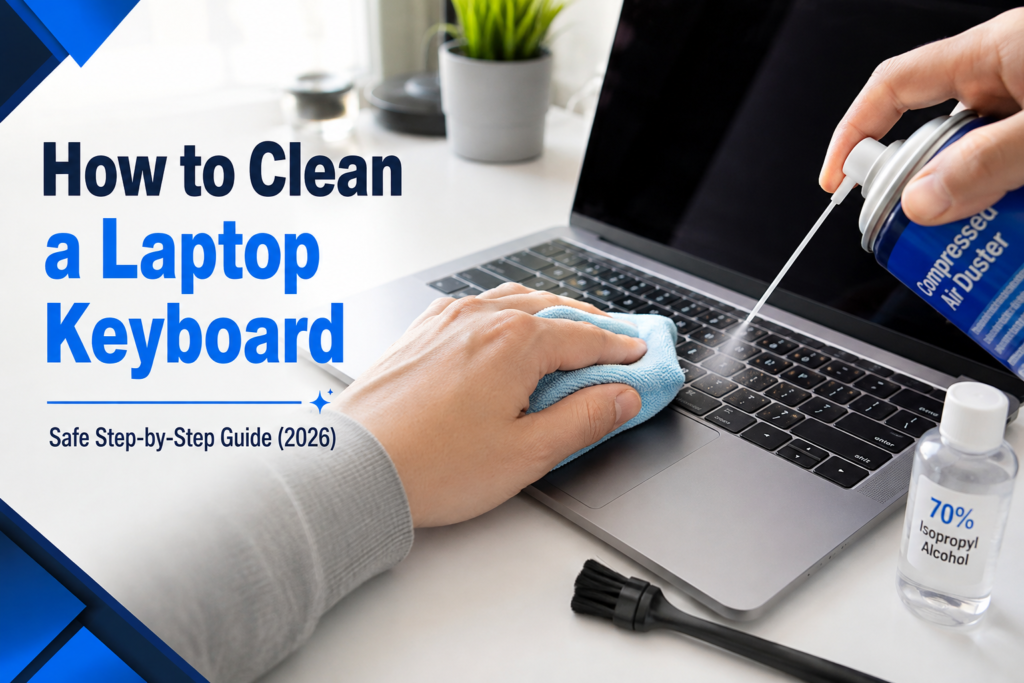
Your laptop keyboard can hide more dirt than you think, and yes, that is why you need to know how to clean a laptop keyboard the right way. I learned this after my own keys started sticking during a late-night work call. The short answer is simple: safe cleaning keeps your laptop fast, clean, and germ-free. In this guide, I will show you how to clean a computer keyboard laptop step by step, how to disinfect a laptop keyboard safely, and even how to clean under laptop keys without damage so let’s get started.
How to Clean a Laptop Keyboard (The Right Way!)
If you’re wondering how to clean a laptop keyboard the right way, I promise it’s easier than it sounds. The short answer is this: power it off, remove loose dust, clean gently, and let it dry fully. I follow the same simple steps every month, and it keeps my keyboard smooth and safe. Think of it like brushing your teeth, but for your laptop.
First, always turn off the laptop. Then unplug the charger and remove external devices like a mouse or USB drive. This step keeps you safe and protects the inside parts. I once skipped this step, and trust me, it is not worth the risk.
Next, turn the laptop upside down and gently shake out loose debris. You will be shocked at what falls out. Crumbs, dust, even tiny hair bits love to hide there. This simple move is the fastest way to clean a computer keyboard laptop at home.
Now grab a can of air and use compressed air in short bursts. Hold it at an angle and do not spray too close. This helps clean under laptop keys without damage. If you do not have air, a soft brush works well too.
After that, clean between keys using a soft brush. Move slow and light. Do not force anything under the keys. This step helps fix small issues like computer keyboard keys sticking.
Then wipe keys with a microfiber cloth. Make it damp, not wet. A wet cloth can harm the inside parts. I like to wipe in small circles to lift oil and dirt.
To disinfect using 70% isopropyl alcohol, put a little on the cloth, not on the keys. This is the safest way to disinfect a laptop keyboard. It kills germs but dries fast. Do not use bleach or strong sprays.
Last step, let everything dry before turning it back on. Give it at least 10 to 15 minutes. This one habit can save you from costly repairs. Clean keys feel light and fast, and your laptop will thank you for it.
That’s it. Simple steps. No stress. Once you learn how to clean a laptop keyboard the safe way, it becomes a quick routine that keeps your device fresh, smooth, and ready for work.
Why You Should Clean Your Laptop Keyboard Regularly

If you use your laptop every day, you need to clean it often. The short answer is simple: regular cleaning keeps your keyboard safe, smooth, and long‑lasting. I have seen many laptops fail just because dust and spills were ignored. A few minutes each month can save you money and stress.
Prevent Dust Buildup

Dust builds up fast, even if your desk looks clean. The short answer is this: dust blocks keys and traps heat. When you clean a computer keyboard laptop often, you stop dirt from hiding under the keys. This also makes it easier to clean under laptop keys later without damage.
Improve Typing Accuracy

Have you ever pressed a key and nothing happened? The short answer is that dirt can block the key switch. Small crumbs can cause computer keyboard keys sticking or missed letters. Regular care keeps your typing smooth and fast.
Remove Germs and Bacteria

Your keyboard can hold more germs than you think. The short answer is yes, germs can live on laptop keys for hours or even days. When you learn how to disinfect a laptop keyboard the right way, you protect your health. I always use 70% isopropyl alcohol on a cloth, not directly on the keys.
Extend Keyboard Lifespan

A clean keyboard lasts longer. The short answer is that less dirt means less wear inside. When dust and sticky residue build up, keys wear out faster. Simple steps like gentle brushing and safe wiping can prevent costly repairs.
Improve Laptop Appearance

A shiny, clean keyboard just feels good. The short answer is that a clean laptop looks newer and more professional. If you work from home or study online, this matters more than you think. When you know how to clean a laptop keyboard and screen together, your whole setup feels fresh and ready for work.
How to Clean a Laptop Keyboard Step by Step
If you want to know how to clean a laptop keyboard step by step, here is the simple answer: power it off, remove dust, clean gently, and let it dry fully. That’s it. No stress. I follow this same order every time, and it keeps my laptop safe and smooth.
Step 1: Power Off Your Laptop

The first step is easy. Turn off your laptop fully. The short answer is this: never clean while it is on.
Why Turning It Off Matters
Powering off protects the inside parts from short circuits. Even a small drop of moisture can cause damage. I once saw a student ruin a keyboard just by wiping it while it was on. It is a small step, but it saves big money.
Step 2: Disconnect the Charger

Next, unplug the charger. If you can, remove external devices too. The short answer is that no power source means less risk. This makes the cleaning process safe from start to finish.
Step 3: Remove Loose Dust

Now it is time to remove loose debris. Tilt the laptop and shake gently. The short answer is that gravity does most of the work for you.
You will see crumbs and dust fall out. This is the fastest way to clean a computer keyboard laptop at home. It also helps prevent computer keyboard keys sticking later.
Step 4: Use Compressed Air Properly

Compressed air helps clean under laptop keys without damage. Hold the can at a slight angle. Use short bursts, not long sprays.
The short answer is this: quick bursts push dust out, long sprays push it deeper. Never spray too close to the keys. That is a common mistake.
Step 5: Brush Between the Keys

Use a soft anti-static brush to clean between the keys. Move gently and do not press hard. The short answer is that light strokes lift dirt safely.
This step helps remove stubborn crumbs. It is also helpful if your keys feel sticky. Gentle brushing keeps the keyboard safe and smooth.
Step 6: Wipe the Keyboard Surface

Now wipe the surface with a microfiber cloth. Make it damp, not wet. The short answer is that too much water can harm your laptop.
Wipe in soft circles. This removes oil and fine dust. If needed, you can lightly dampen the cloth with 70% isopropyl alcohol to disinfect a laptop keyboard safely.
Step 7: Let Everything Dry
This step is simple but very important. Let everything dry before turning it back on. The short answer is to wait at least 10 to 15 minutes.
Dry time prevents moisture damage. Once dry, your keyboard will feel clean and fresh. That is the safe and proper way to clean a laptop keyboard step by step.
How to Disinfect a Laptop Keyboard Safely

If you are wondering how to disinfect a laptop keyboard, the short answer is simple: use the right alcohol, apply it to a cloth, and never soak the keys. I always tell my readers this first because too much liquid is the real danger. Disinfecting is about killing germs, not flooding your keyboard. Done the right way, it is safe and easy.
Can Germs Live on Laptop Keyboards?

Yes, germs can live on laptop keyboards for hours or even days. The short answer is that your keyboard is one of the most touched parts of your device. If you eat, cough, or share your laptop, bacteria can build up fast. That is why learning how to disinfect a laptop keyboard matters for your health.
Best Disinfectants

The safest choice is isopropyl alcohol. The short answer is to use alcohol-based solutions, not bleach or harsh cleaners. Alcohol kills most common germs and dries quickly. I avoid spray cleaners because they can drip under laptop keys.
Is Isopropyl Alcohol Safe?
Yes, isopropyl alcohol is safe when used the right way. The short answer is to apply it to a microfiber cloth, not directly to the keyboard. Gently wipe the keys and let them air dry. I have used this method for years without damage.
What Percentage Alcohol Should You Use?
The best option is 70% isopropyl alcohol. The short answer is that 70% kills germs well and evaporates at a safe rate. Higher levels like 99% dry too fast and may not clean as evenly. Stick with 70% for a safe balance.
What to Avoid
Never spray liquid directly onto the keyboard. The short answer is that liquid can seep inside and cause short circuits. Avoid bleach, window cleaner, and baby wipes with heavy chemicals. If you follow these simple steps, you can disinfect your laptop keyboard safely without harming the internal parts.
How to Clean Under Laptop Keys

If you want to clean under laptop keys, the short answer is this: be gentle and know your keyboard type first. I always tell beginners not to rush this step. Laptop keys are small and delicate, like tiny doors on a hinge. One wrong move can break the clip under the key.
Can Laptop Keys Be Removed?
Yes, some laptop keys can be removed, but not all. The short answer is that it depends on your keyboard design. Before you try, check your laptop model online. This small step can save you from costly damage.
Scissor-switch Keyboards
Most modern laptops use scissor-switch keyboards. The short answer is that these keys can sometimes be lifted carefully. They have small plastic clips under them. If you pull too hard, the clips can snap.
Mechanical Keyboards
Mechanical keyboards are easier to work with. The short answer is yes, their keys are made to come off. You can use a keycap puller to remove them safely. These are more common on external keyboards than slim laptops.
Butterfly Keyboards
Butterfly keyboards are very fragile. The short answer is do not remove these keys unless you are trained. They break easily and cost more to fix. If you own one, it is safer to use compressed air only.
HP Keyboards
HP keyboards usually use scissor-switch designs. The short answer is some keys can be removed, but you must be careful. I always suggest checking your exact HP model guide first. When in doubt, avoid pulling the keys.
How to Clean Under Keys Without Damage
The safest way to clean under laptop keys is without removing them. The short answer is to use compressed air and a soft brush. Blow short bursts of air at an angle to push debris out. Then use a soft anti-static brush to lift any stuck dust.
If needed, lightly dampen a cotton swab with 70% isopropyl alcohol. Make sure it is not dripping. This helps remove sticky residue without harming internal parts. Slow and gentle wins every time.
When You Should Not Remove Keys
Do not remove keys if your laptop is under warranty. The short answer is that damage may not be covered. Also avoid removing keys if they already feel loose. For deep issues like computer keyboard keys sticking due to spills, professional repair may be safer.
Cleaning under keys can feel scary at first. I understand that feeling. But if you move slowly and use the right tools, you can clean under laptop keys safely and keep your keyboard working like new.
How to Clean a Laptop Keyboard and Screen Together
If you want to know how to clean a laptop keyboard and screen safely, the short answer is this: clean the keyboard first, then the screen, using the right tools. I always treat it like cleaning glasses and hands at the same time. One needs dry care, the other needs gentle wipes. When done right, your whole laptop feels fresh and new.
Correct Cleaning Order
The correct cleaning order is simple: keyboard first, screen second. The short answer is that dust from the keyboard can fall onto the screen. If you clean the screen first, you may dirty it again. I always power off the laptop before starting to stay safe.
Start by removing loose debris from the keyboard. Then wipe it with a microfiber cloth. After that, move to the screen with a clean cloth.
Screen Cleaning Materials
Use a soft microfiber cloth only. The short answer is no paper towels, no rough fabric. Paper can scratch the screen over time. I keep one cloth just for my screen so it stays clean and dust‑free.
If needed, use a small amount of screen-safe cleaner. Make sure it is made for LCD or LED displays. Always spray the cleaner on the cloth, not on the screen.
Avoid Screen Damage
Screens are more delicate than they look. The short answer is never press hard while wiping. Too much pressure can damage pixels inside the display. Gentle, slow wipes work best.
Avoid window cleaner, bleach, or strong chemicals. These can strip the screen coating. I have seen screens turn cloudy from using the wrong spray.
Safe Cleaning Solution
The safest option is a small amount of distilled water or a 50/50 mix of water and white vinegar for light stains. The short answer is to keep the cloth damp, not wet. Too much liquid can drip into the keyboard or screen edges.
When you finish, let everything air dry before closing the lid. Cleaning your laptop keyboard and screen together once a month keeps your device clean, healthy, and ready for work or study.
How to Clean a Computer Keyboard Laptop Without Compressed Air
If you are wondering how to clean a computer keyboard laptop without compressed air, the short answer is this: use gentle tools you already have at home. I know not everyone keeps a can of air on their desk. The good news is you can still clean your laptop keyboard safely. You just need to move slow and be gentle.
Methods
Here are simple ways to clean your keyboard without compressed air. The short answer is to focus on lifting dust, not pushing it deeper.
- Soft brush
A small, soft brush works great. The short answer is that light strokes loosen dust between the keys. I like to tilt the laptop slightly while brushing so crumbs fall out on their own. - Cotton swab
A cotton swab helps clean tight spaces. The short answer is to keep it slightly damp, not wet. You can add a tiny bit of 70% isopropyl alcohol to remove sticky spots. This also helps if you notice computer keyboard keys sticking. - Microfiber cloth
A microfiber cloth is perfect for the surface. The short answer is to wipe gently in small circles. This removes oil, fine dust, and germs without scratching the keys. - Portable blower
A small hand-held blower is a safe option. The short answer is that it pushes air without moisture. It works well to clean under laptop keys without removing them. - Hand air blower
You can also use a manual air pump, like the ones used for camera lenses. The short answer is short, gentle bursts are enough. This method is simple and safe for deep cleaning.
Even without compressed air, you can keep your keyboard clean and healthy. I have used these methods many times when traveling or working from a café. With a little care, you can clean a computer keyboard laptop at home and keep it working like new.
Computer Keyboard Keys Sticking? Here’s How to Fix It
If you are dealing with computer keyboard keys sticking, the short answer is this: dirt or liquid is usually the cause. I know how frustrating it feels when a key does not pop back up. It can ruin your flow during work or study. The good news is most sticky keys can be fixed at home.
Common Causes
The short answer is that sticky keys are almost always caused by buildup under the keycaps.
- Dust
Dust slips under keys over time. It mixes with air moisture and turns slightly sticky. This can slow the key return. - Food particles
Tiny crumbs fall between keys more often than we think. I once found biscuit crumbs under my space bar. Even small bits can block movement. - Spilled drinks
Coffee, soda, or juice can dry and leave sugar behind. That sugar creates glue-like spots under the key. This is a very common reason for laptop keyboard keys sticking. - Sticky residue
Oil from your fingers can build up over time. It may not look dirty, but it can affect how keys feel. Regular cleaning helps prevent this.
Easy Fixes
The short answer is to clean first, replace later. Start by turning off the laptop and unplugging it. Then tilt it and gently shake out loose debris.
Use compressed air or a hand blower to clean under the keys. If needed, wipe around the sticky key with a microfiber cloth lightly dampened with 70% isopropyl alcohol. This helps dissolve sugar and oil safely.
If the key still sticks, you may need to carefully clean under laptop keys using a soft brush. Move slow and do not force anything. Gentle care usually solves the issue.
When Replacement Is Needed
Sometimes cleaning is not enough. The short answer is that liquid damage or broken clips may require replacement. If a key feels loose or does not respond at all, the internal part may be damaged.
In that case, replacing the single key or the whole keyboard may be the best option. It sounds scary, but it is often cheaper than buying a new laptop. Still, in most cases, simple cleaning fixes computer keyboard keys sticking and brings your typing back to normal.
How to Remove Sticky Liquid from Laptop Keyboard
Spilled a drink? Take a deep breath. The short answer on how to remove sticky liquid from laptop keyboard is this: power off fast, dry it gently, then clean with 70% isopropyl alcohol. I have had coffee spill mid‑meeting, and quick action saved my keyboard. Move calm and steady, not rushed.
Coffee
Coffee leaves dark stains and can turn tacky as it dries. The short answer is to turn off the laptop and unplug it right away. Blot the surface with a dry microfiber cloth. Then lightly wipe the area with a cloth dampened with 70% isopropyl alcohol to break down the residue.
Soda
Soda is sticky because of sugar. The short answer is sugar acts like glue under the keys. After powering off, tilt the laptop and let excess liquid drain out. Clean around the affected keys with alcohol on a cloth or cotton swab to dissolve the sugar safely.
Juice
Juice can be thick and acidic. The short answer is to dry first, then clean gently. Blot, do not rub, so you do not spread it deeper. Once dry, use a soft brush and a small amount of alcohol to clean under the edges of the keys.
Tea
Tea may seem light, but it can still leave residue. The short answer is to treat it like coffee, especially if it had sugar. Turn off the device, blot the spill, and wipe with a damp microfiber cloth. Finish with a light alcohol wipe to disinfect and remove stickiness.
Emergency Cleaning Guide
If a large spill happens, act fast. The short answer is power off, unplug, and flip the laptop upside down like a tent. Let gravity help drain the liquid out. Do not turn it back on for at least 24 hours.
If keys still feel sticky after drying, you may need to gently clean under laptop keys using a soft brush. In severe cases, professional repair is safer. Most small spills can be fixed at home if you act quickly and clean with care.
Can You Vacuum a Laptop Keyboard?
Short answer: yes, but you must be careful. When people ask me, can you vacuum a laptop keyboard, I always say it depends on how you do it. A vacuum can remove loose crumbs fast. But strong suction can also damage small parts under the keys.
I once saw someone use a large home vacuum on full power. Two keys popped right off. So yes, it can help, but only with the right method.
Pros
The biggest benefit is quick cleaning. The short answer is a vacuum can pull out loose dust and crumbs in seconds. It works well if you do not have compressed air.
It can also help with light computer keyboard keys sticking caused by dry debris. A small handheld vacuum is better than a large one. Gentle suction is the key.
Cons
The main risk is strong suction. The short answer is high power can loosen or remove keys. Laptop keys are small and delicate.
Vacuums can also create static electricity. Static can harm internal parts if the device is not powered off. That is why you must always turn off and unplug first.
Best Practices
If you choose to vacuum, use a small handheld vacuum with low suction. The short answer is never use full power. Keep the nozzle slightly above the keys, not pressed down.
Do not drag the nozzle across the keyboard. Move slowly and lightly. For deep cleaning, I still prefer compressed air or a soft brush to clean under laptop keys safely.
So, can you vacuum a laptop keyboard? Yes, but only with care. Think of it like using a strong wind near tiny doors. Gentle airflow helps. Strong force can cause damage.
Common Laptop Keyboard Cleaning Mistakes
The short answer is this: most keyboard damage happens during cleaning, not daily use. I have seen more harm from wrong cleaning habits than from dust itself. When you know the common laptop keyboard cleaning mistakes, you can avoid costly repairs. Let’s keep it simple and safe.
Spraying Cleaner Directly
Never spray cleaner directly on the keyboard. The short answer is liquid can slip under the keys and reach the circuit board. Even a small amount can cause short circuits. Always spray on a microfiber cloth first, then wipe gently.
Using Too Much Water
More water does not mean more clean. The short answer is too much moisture can damage internal parts. A cloth should be damp, not wet. If drops are falling, it is too much.
Removing Keys Incorrectly
Pulling keys off without knowing the keyboard type is risky. The short answer is clips under laptop keys break easily. I once saw a key snap because someone forced it up with a knife. If you are not sure, it is safer to clean under laptop keys with air or a soft brush.
Using Paper Towels
Paper towels feel soft, but they can scratch keys and screens. The short answer is they leave tiny marks over time. They also leave lint between keys. A microfiber cloth is always the better choice.
Cleaning While Powered On
This is one of the biggest mistakes. The short answer is never clean while the laptop is on. Liquid and power do not mix. Always turn off and unplug before you start.
Cleaning your keyboard should feel like careful care, not a rush job. Think of it like cleaning glasses. Gentle hands and the right tools make all the difference. When you avoid these common laptop keyboard cleaning mistakes, your device stays safe, clean, and ready for work.
Laptop Keyboard Cleaning Tips by Brand
The short answer is this: most keyboards clean the same way, but small design differences matter. I have worked with many brands over the years, and each has tiny quirks. If you follow brand‑specific care, you lower the risk of damage. Let’s keep it simple and practical.
HP Laptop Keyboard
HP laptop keyboards often use scissor‑switch keys. The short answer is they are sturdy but still delicate under the caps. Always power off and unplug before cleaning.
If your HP model has a removable battery, take it out first for extra safety. You can also check this guide: How to Remove Hard Drive from HP Laptop. For deep cleaning, use compressed air and a soft brush rather than pulling keys off.
Dell Laptop
Dell keyboards are usually durable and easy to maintain. The short answer is gentle air and microfiber wipes work best. Avoid strong suction or sharp tools under the keys.
Some Dell business models are spill‑resistant, but that does not mean waterproof. Always dry fully before turning the device back on.
Lenovo Laptop
Lenovo keyboards, especially ThinkPad models, are known for comfort. The short answer is they handle light cleaning well but dislike excess liquid. Keep your cloth damp, not wet.
Lenovo keys sit snug in place. If you try to remove them without care, clips can snap. Air and soft brushing are safer options.
ASUS Laptop
ASUS laptops often have slim key designs. The short answer is less force, more patience. Use short bursts of air to clean under laptop keys.
Because many ASUS models are thin, liquid can spread fast inside. Always apply cleaner to the cloth, never directly to the keyboard.
Acer Laptop
Acer keyboards are simple to maintain. The short answer is regular light cleaning prevents bigger issues. Shake out debris and wipe weekly if you use it daily.
If keys feel sticky, use a small amount of 70% isopropyl alcohol on a microfiber cloth. Let it dry fully before use.
MacBook Keyboard
MacBook keyboards, especially older butterfly models, are very delicate. The short answer is never force keys off. Apple even recommends specific compressed air angles for cleaning.
Hold the MacBook at a slight angle and spray short bursts across the keyboard. Avoid heavy pressure and never use metal tools. Gentle care keeps it working smoothly.
No matter the brand, the golden rule is the same. Power off first. Use gentle tools. Keep liquids controlled. When you clean with care, your laptop stays reliable and ready for work every day.
What If Your Laptop Stops Working After Cleaning?
Take a breath. The short answer is this: most laptops stop working after cleaning because of moisture or power issues. I know that sinking feeling when you press the power button and nothing happens. It feels like you broke it. But in many cases, the fix is simple and calm steps can save the day.
Possible Causes
The short answer is that three common issues cause trouble after cleaning.
- Moisture damage
Even a small drop of liquid can slip inside. If the laptop will not turn on, moisture may still be present. This is the most common reason after keyboard cleaning.
- Loose keyboard connector
If keys were removed or pressed too hard, the internal connector may shift. This can cause some keys or the whole keyboard to stop working. - Static electricity
Cleaning tools or vacuums can create static. Static can interrupt internal parts for a short time. This is rare, but it can happen.
Troubleshooting Steps
The short answer is do not power it on again right away. First, unplug everything. If possible, remove the battery.
Let the laptop dry for at least 24 hours in a cool, dry place. Do not use a hair dryer. Gentle air flow is safer than heat.
After drying, reconnect the battery and charger. Try turning it on once. If it still does not respond, check this full guide: HP Laptop Not Turning On?
If only the keyboard is not working, an external USB keyboard can help you test the system. This tells you if the issue is just the keyboard or something deeper.
I always remind readers that panic makes things worse. Think of your laptop like a wet book. It needs time to dry before you open it again. In most cases, patience and careful steps bring it back to life.
Should You Remove the Battery Before Cleaning?
Yes, if your laptop allows it. When people ask me, should you remove the battery before cleaning, I say it is the safest choice for deep cleaning. Power and liquid are a risky mix. Even a few drops of alcohol can cause damage if power is still flowing.
For light dusting, turning off the laptop may be enough. But if you plan to disinfect the keyboard or clean under laptop keys, removing the battery adds extra safety. I see it like locking the door before you mop the floor. It gives peace of mind.
Removable vs Non-Removable Batteries
The short answer is your laptop design decides what you can do.
If your device has a removable battery, take it out before cleaning. This fully cuts power to the system. If you use an HP model, follow this guide: How to Remove Battery from HP Laptop. It only takes a few minutes and lowers the risk of short circuits.
If your laptop has a non-removable battery, do not open the back unless you have experience. Instead, shut it down fully and unplug the charger. Then hold the power button for 10 seconds to release stored charge.
I always tell beginners that safety steps may feel small, but they matter. Removing the battery before cleaning protects your keyboard, your motherboard, and your wallet. A few extra minutes now can prevent costly repairs later.
Can Cleaning Fix Keyboard Problems?
Short answer: yes, but not always. Many readers ask me, can cleaning fix keyboard problems, and the honest answer depends on the cause. If the issue is dirt or residue, cleaning often works. If the issue is hardware damage, cleaning will not help.
I like to think of it like cleaning a clogged sink. If the clog is food, cleaning helps. If the pipe is broken, you need repair.
Problems Cleaning Can Solve
The short answer is cleaning helps when dirt is the real problem.
- Sticky keys
If your keys feel slow or sticky, dust or dried liquid is often the cause. A gentle clean with compressed air and 70% isopropyl alcohol can fix it. I have seen many sticky keys return to normal after simple cleaning. - Dust
Dust builds up under keys over time. This can block smooth movement. Cleaning under laptop keys with air or a soft brush often solves this. - Missed keystrokes
If letters do not register, debris may be blocking contact. Light cleaning can restore normal typing. Many cases of computer keyboard keys sticking improve after deep cleaning.
Problems Cleaning Cannot Solve
The short answer is cleaning cannot repair physical damage.
- Broken membrane
If the internal keyboard membrane is damaged, cleaning will not fix it. The key may stop working completely. - Water damage
If liquid reached the circuit board, corrosion can happen. In this case, repair or replacement is often needed. - Faulty motherboard
If the issue is deeper inside the laptop, cleaning the keyboard will not help. This needs technical repair.
I always tell readers to start with cleaning because it is simple and low risk. If the problem remains after careful cleaning, it may be a hardware issue. Cleaning can fix many keyboard problems, but not all of them.
When Should You Replace Your Laptop Keyboard?
Replace it when cleaning no longer works. Many readers ask me, when should you replace your laptop keyboard, and the answer is simple. If the problem is physical damage, not dirt, replacement is often the best choice. Cleaning helps with dust and sticky keys, but it cannot fix broken parts.
I always say your keyboard is like a pair of shoes. If they are just dirty, clean them. If the sole is broken, you replace them.
Signs You Need a Replacement
The short answer is these signs usually mean cleaning will not fix it.
- Missing keys
If a keycap is gone and the clip is broken, you may need a new key or full keyboard. Loose keys that will not snap back are a common sign. - Dead keys
If certain keys never respond, even after cleaning under laptop keys, the internal switch may be damaged. This often means replacement is needed. - Repeated characters
If one press types two or three letters, the key switch may be faulty. Sometimes this is software, but often it is hardware wear. - Water damage
If liquid reached deep inside, corrosion can happen. Even after drying, keys may stop working. In this case, replacing the keyboard is often safer than repeated repairs. - Physical cracks
Cracks around the keyboard area or broken key frames are clear warning signs. Damage like this rarely improves with cleaning.
I always tell readers not to rush into buying a new laptop. In many cases, replacing just the keyboard is affordable. If your keyboard shows these signs, replacement may be the smart move. Clean when you can. Replace when you must.
Laptop Keyboard Maintenance Tips
Small habits prevent big problems. Good laptop keyboard maintenance tips keep your device clean, safe, and long‑lasting. I always tell my readers that prevention is easier than repair. A few simple steps each week can save you from sticky keys and costly fixes.
- Wash hands
Clean hands mean a cleaner keyboard. Oil and dirt from fingers build up fast. I made this a habit, and my keys stay smooth longer. - Keep food away
Crumbs are the number one cause of computer keyboard keys sticking. Even small snack bits can fall under laptop keys. Try to keep drinks and snacks at a safe distance. - Use keyboard cover
A thin keyboard cover blocks dust and spills. It works like a raincoat for your keys. Just remember to clean the cover too. - Weekly dusting
The short answer is light cleaning once a week prevents deep cleaning later. Tilt the laptop and use a soft brush or air to remove loose dust. It only takes a minute. - Monthly deep cleaning
Once a month, do a full clean. Power off, wipe with a microfiber cloth, and disinfect with 70% isopropyl alcohol. This keeps germs away and improves typing feel.
Think of your keyboard like your desk. When it stays clean, work feels better. With simple laptop keyboard maintenance tips, your device stays fresh, smooth, and ready every day.
FAQs
Yes, you can use alcohol to clean your laptop keyboard. The short answer is to use 70% isopropyl alcohol on a microfiber cloth, not straight on the keys. This helps remove oil, dirt, and germs. Keep the cloth damp, not wet.
For most people, 70% is better. The short answer is that 70% isopropyl alcohol cleans and disinfects well, while still drying fast. 99% alcohol dries very fast, but it may not disinfect as evenly. I use 70% because it gives a safer balance.
Sometimes, yes, but be careful. The short answer is that some laptop keys can be removed, but many are easy to break. Thin laptops, MacBooks, and scissor-switch keys need extra care. If you are unsure, clean under laptop keys with air or a soft brush instead.
Clean it lightly once a week and deep clean it once a month. The short answer is weekly dusting keeps crumbs and dust away. Monthly deep cleaning helps disinfect the laptop keyboard and keep keys smooth. If you eat near your laptop, clean it more often.
Yes, if you use it the wrong way. The short answer is compressed air is safe when used in short bursts at an angle. Do not spray too close or tilt the can too much. This can push dust deeper or release moisture.
It is better not to use baby wipes. The short answer is baby wipes can contain water, oils, or lotion. These can leave residue on the keys. A microfiber cloth with a little 70% isopropyl alcohol is safer.
No, hand sanitizer is not the best choice. The short answer is sanitizer can contain gel, scent, and other additives. These can make computer keyboard keys sticking worse. Use isopropyl alcohol instead.
Sticky keys usually come from dust, crumbs, oil, or spills. The short answer is dirt under the keys blocks smooth movement. Drinks like coffee, soda, juice, or tea can leave sugar behind. Cleaning under laptop keys can often fix this.
The safest way is to use compressed air, a soft brush, or a dry cotton swab. The short answer is to clean under laptop keys without pulling them off unless you know the keyboard type. Move slowly and do not force tools under the keys. For sticky spots, use a tiny amount of 70% isopropyl alcohol on a swab.
No, never clean while the laptop is on. The short answer is power and liquid can cause damage. Always shut down the laptop, unplug the charger, and remove external devices first. This is the safest way to clean a laptop keyboard.
Conclusion
The short answer is this: power off, remove loose dust, use compressed air, wipe gently with a microfiber cloth, disinfect with 70% isopropyl alcohol, and let it dry fully before turning it back on. If you follow this safe process, you can clean a laptop keyboard without damage and prevent expensive repairs. I always tell my readers that small monthly care keeps computer keyboard keys sticking away and makes typing feel smooth again. Make it a habit to clean your keyboard once a month, and if you use HP, check related guides like How to Remove Battery from HP Laptop or HP Laptop Not Turning On? to keep your device in top shape.