
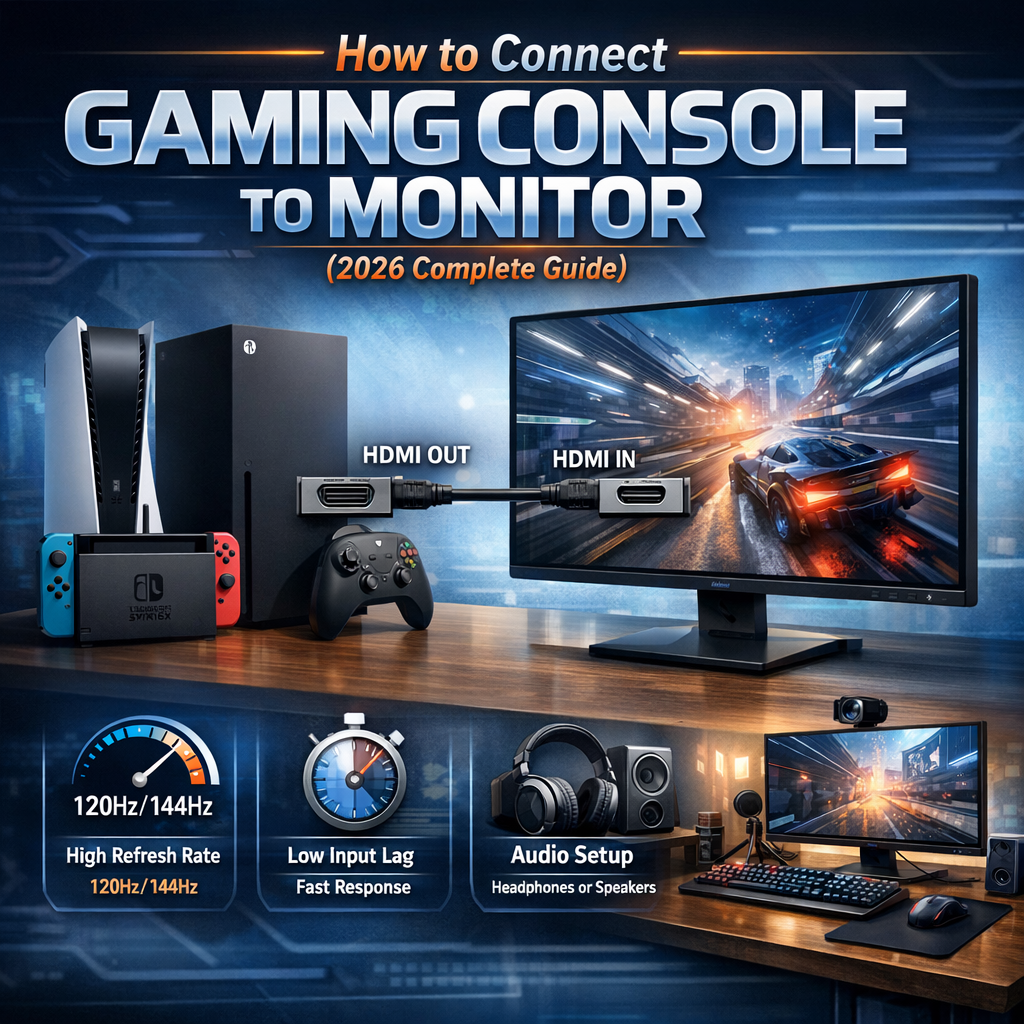
To connect a gaming console to a monitor, plug an HDMI cable from the console’s HDMI OUT to the monitor’s HDMI IN, select that HDMI input, and then set up your sound. That’s the simple core of how to connect gaming console to monitor, whether it’s a PS5, Xbox, or even how to connect a gaming console to a computer monitor on a small desk. I’ve helped friends do this with all kinds of screens, from cheap office monitors to fancy gaming ones, and the steps are always easier than they look. In this guide, I’ll walk you through each step in plain language so you can plug in, see a picture, hear sound, and start playing with confidence.
Why Use a Monitor Instead of a TV?

A monitor is better than a TV for console gaming if you want smooth play, fast response, and a clean desk setup. In simple terms, a good monitor can make your games feel sharper and more “connected” to your hands than most living‑room TVs. When you learn how to connect gaming console to monitor, you’re not just changing the screen; you’re upgrading the whole feel of your games.
Better refresh rates (120Hz / 144Hz)
Monitors often support 120Hz or 144Hz, which means the picture refreshes more times per second than on a normal TV. More refreshes per second = smoother motion, less blur, and a clearer view when things get fast on screen. If you play shooters, racing games, or sports games, that smooth look can help you track targets and react in time.
Lower input lag
Monitors are built with lower input lag, so the time between you pressing a button and seeing the action is as short as possible. Low input lag makes your controls feel tight and direct, not soft or delayed like some TVs in “cinema” mode. This small time gain can be the difference between landing a shot and watching the kill cam.
Ideal for competitive gaming
Because of their better refresh rates and lower input lag, monitors are ideal for competitive gaming. This is why esports players and streamers almost always sit in front of a monitor, not a big TV on the wall. If you care about ranked matches, 1v1s, or tournaments, a monitor gives you an edge before you even touch your settings.
Compact setups (desk, streaming, dorm room)
Monitors also fit better in tight spaces like a desk, a dorm room, or a small streaming corner. A monitor lets you keep your PS5, Xbox, or Switch close, plus your keyboard, mic, and camera, all in one focused spot. When you know how to connect gaming console to monitor in this kind of setup, you can game, study, and stream from the same clean, compact space.
Before You Start – Important Things to Check
Before you start, there are two important things to check: your ports and your sound. This is the real “prep step” for how to connect gaming console to monitor without stress. If you know which cable you can use and how you’ll hear audio, the rest is just plug‑and‑play. Take one minute to check these now, and you’ll save ten minutes of guessing later.
1. Port Selection: HDMI, HDMI, HDMI (Most Important)
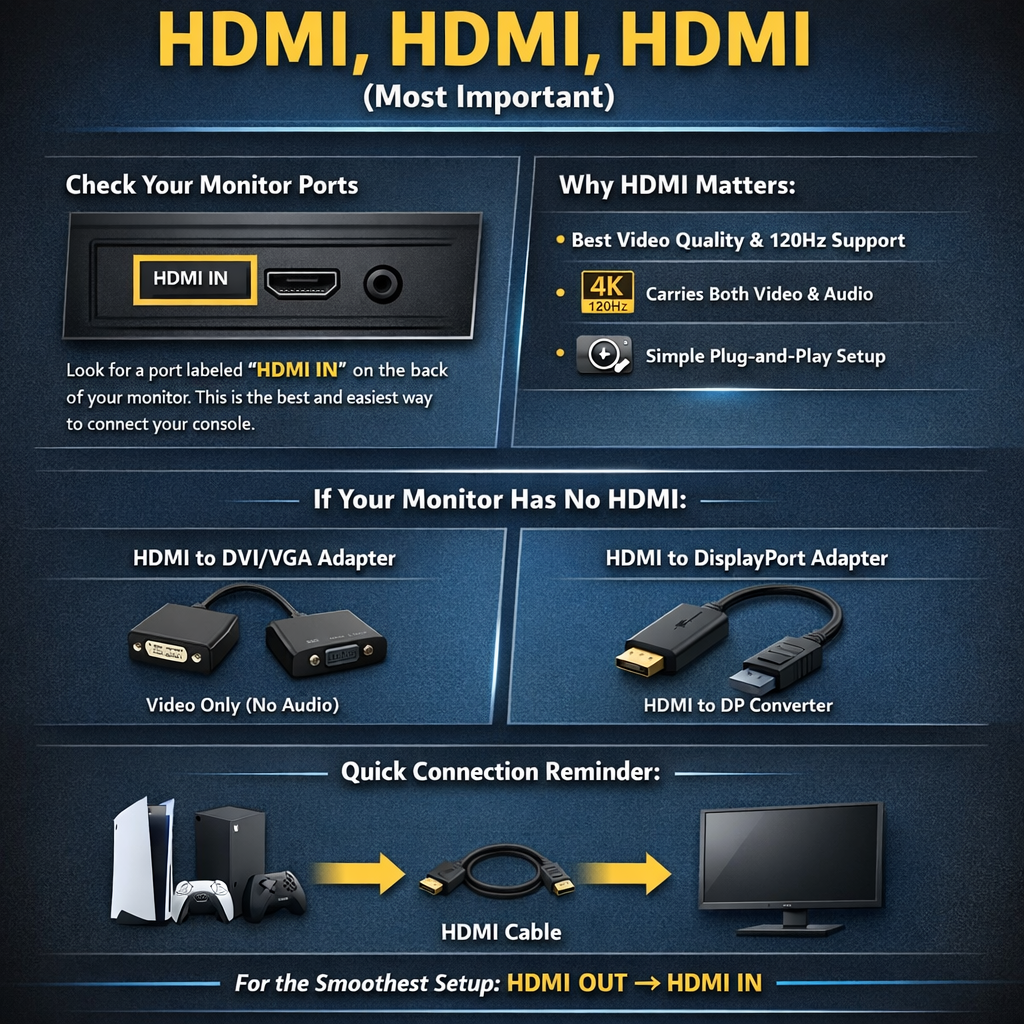
The most important thing to check is which port your monitor has, because HDMI makes a gaming console to monitor HDMI setup simple and clean. Look on the back of the screen for a port labeled HDMI IN – this is the best and easiest way to connect any PS5, Xbox, or Switch. If your monitor only has VGA or DVI, you can still connect, but you’ll need an HDMI adapter and those ports do not carry sound. If it has DisplayPort only, you’ll need an HDMI‑to‑DisplayPort adapter that supports video from your console to the monitor.
In short, if you want the smoothest how to connect gaming console to monitor setup, HDMI on both sides is what you want. This also matters for things like 120Hz gaming on PS5 or an Xbox to monitor setup, since HDMI 2.0 or 2.1 supports higher refresh rates on modern screens. So, before you plug anything in, make a quick list: “Console HDMI OUT → Monitor HDMI IN” or “Console HDMI OUT → Adapter → Monitor port.” That clear path will guide every step that comes next.
2. Built-in Speakers or External Speakers?
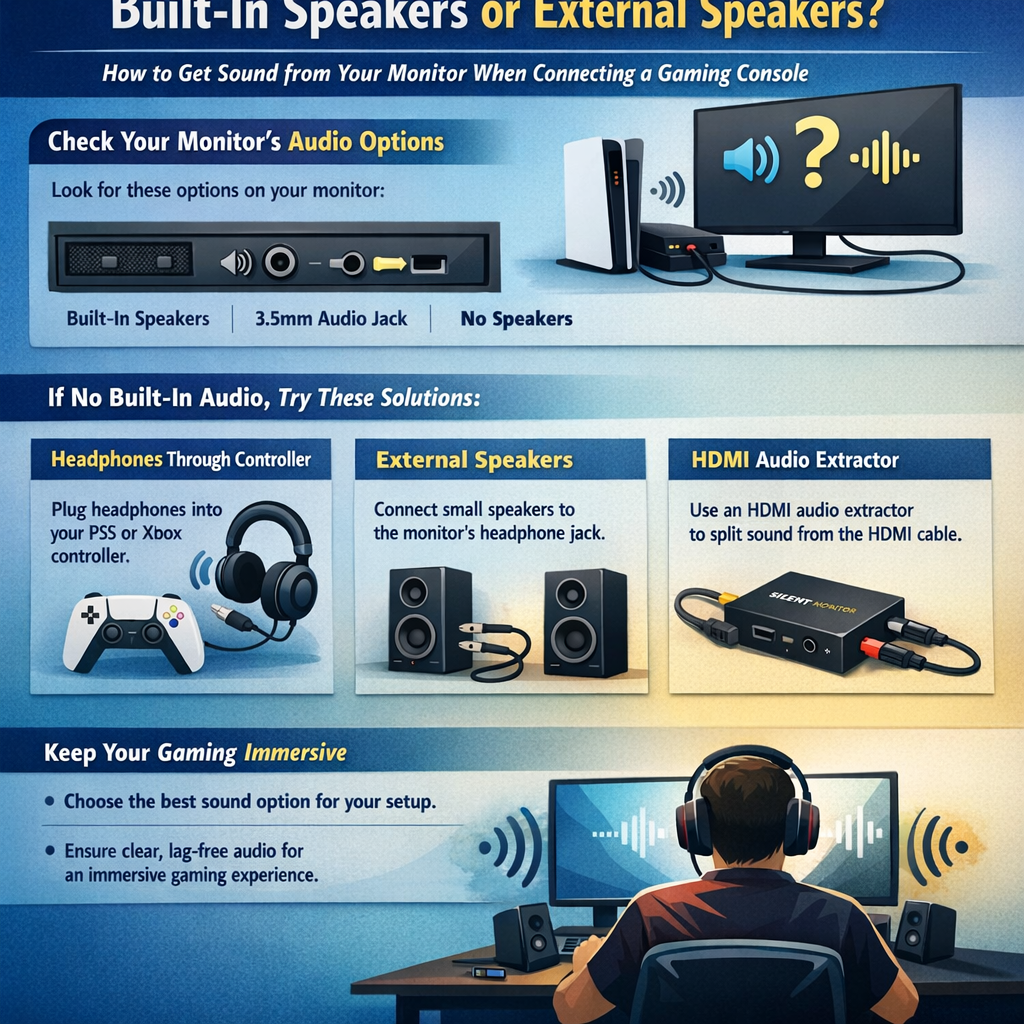
The second key thing to check before you start is how you’ll get sound from your monitor. Most basic office monitors do not have speakers, so if you expect sound from the screen and it stays silent, nothing is actually “broken” – the monitor just cannot play audio. Look for small speaker holes or a 3.5mm headphone jack on the back or side of the monitor, or check the model online.
If your monitor has no speakers, you still have easy options for how to connect gaming console to monitor with sound. You can plug headphones into your controller (PS5 or Xbox), use small external speakers, or use an HDMI audio extractor to split sound from the HDMI cable. Knowing this before you plug in your console means you will not be surprised when the picture works but the room is quiet.
What You’ll Need
To connect a gaming console to a monitor, you only need a few basic parts and a couple of nice‑to‑have extras. Think of this as your simple checklist for how to connect gaming console to monitor without any surprises. If you can tick off these items before you start, the actual setup will feel quick and easy.
- HDMI cable (2.0 or 2.1 recommended)
You need one HDMI cable to go from the console’s HDMI OUT to the monitor’s HDMI IN, and HDMI 2.0 or 2.1 is best for 4K and 120Hz.
- Gaming console (PS5, Xbox, Switch)
Any modern console will work the same way here, whether it’s a PS5, Xbox Series X/S, or Nintendo Switch in its dock.
- Monitor with HDMI IN
A monitor with at least one HDMI IN port makes the whole gaming console to monitor HDMI setup simple and plug‑and‑play.
- Optional: HDMI adapter (DVI/VGA)
If your monitor only has VGA or DVI, you’ll need an HDMI adapter so the console can still send video to the screen.
- Optional: Audio extractor
An HDMI audio extractor lets you pull sound out of the HDMI cable and send it to speakers if your monitor has no audio.
- Optional: Capture card (for laptop setup)
If you want to know how to connect a gaming console to a computer monitor on a laptop, a capture card is what turns the console’s HDMI signal into something your laptop can display.
Step-by-Step – How to Connect Gaming Console to Monitor
This is the core section where we go step-by-step so you can actually see your console on your monitor. Think of this as a simple map: follow each step in order, and you’ll go from “black screen” to “game loaded” without guessing. In this step-by-step how to connect gaming console to monitor guide, we’ll start with the easy HDMI method, then cover adapters and laptop setups. You don’t need to be “good with tech” – just take it slow and tick off each step as you go.
Method 1 – Standard HDMI Setup (Best & Easiest Way)
This is the best and easiest way to connect a PS5, Xbox, or Switch to almost any modern monitor. If both your console and monitor have HDMI ports, use this method first before trying anything more complex. It gives you the cleanest picture and sound path, and it’s the one I use in my own setup and when I help friends.
- Turn off both the console and the monitor.
- Plug one end of the HDMI cable into the console’s HDMI OUT port.
- Plug the other end of the HDMI cable into the monitor’s HDMI IN port.
- Turn on the monitor first and wait a few seconds.
- Turn on the console.
- On the monitor, press the Input / Source button and choose the HDMI port you used (HDMI 1, HDMI 2, etc.).
- If you have no sound from the monitor, plug in headphones to the controller or connect speakers to the monitor’s audio jack.
If the image appears but looks blurry or small, don’t worry – the connection is correct, you just need to fix the resolution later in your console settings. For most people, this standard HDMI setup is all you need for a smooth gaming console to monitor HDMI connection.
Method 2 – Using HDMI to DVI or VGA Adapter
Use this method if your monitor does not have HDMI, but only has DVI or VGA. I’ve done this a few times with older office monitors, and it works fine for casual play, as long as you know the limits. The key thing to remember is that DVI and VGA only carry video, not sound.
- Turn off your console and monitor.
- Plug the HDMI cable into the console’s HDMI OUT port.
- Connect the other end of the HDMI cable to your HDMI-to-DVI or HDMI-to-VGA adapter.
- Plug the adapter into the DVI or VGA port on the monitor.
- Turn on the monitor, then turn on the console.
- Use the monitor’s Input / Source button to select DVI or VGA (whichever you used).
Because DVI and VGA do not send audio, you will need a separate sound solution, like headphones in your controller or external speakers. Also, expect a lower maximum resolution and no fancy 120Hz modes on many older screens, but for basic gaming this setup still does the job.
Method 3 – How to Connect a Gaming Console to a Computer Monitor (Laptop Case)
If you want to use your laptop screen as a monitor for your console, the steps are a bit different. Most laptops only have HDMI OUT, which means they can send a signal to a TV or monitor, but they cannot take an HDMI signal in from your PS5 or Xbox. To make this work, you need a capture card.
- Plug the console’s HDMI cable into the HDMI IN port on the capture card.
- Plug the capture card into your laptop using USB (usually USB‑A or USB‑C).
- Install any software that comes with the capture card, then open it on your laptop.
- Turn on the console and wait for the software to show the console screen in a window.
This method is handy if you travel, live in a dorm, or only have a laptop and no separate monitor. Just remember that a capture card setup can add a tiny bit of delay, so it’s better for casual play, story games, or recording content than for super serious competitive matches.
Console-Specific Setup Guides
These console-specific setup guides walk you through how to connect gaming console to monitor for PS5, Xbox Series X/S, and Nintendo Switch, with the small details that actually matter. The basic steps are the same, but each console has its own menus and extra settings for things like 120Hz and HDR. Think of this section as a shortcut so you don’t have to dig through every menu yourself. Pick your console below and follow the steps one by one.
How to Connect PS5 to Monitor
To connect a PS5 to a monitor, plug an HDMI cable from the PS5’s HDMI OUT to the monitor’s HDMI IN, turn both devices on, and select that HDMI input on the monitor. For the best results, use an HDMI 2.1 cable with a monitor that supports 120Hz, especially if you want smooth 4K 120Hz gaming. This simple setup is all you need for a clean PS5‑to‑monitor connection.
To set 4K 120Hz on PS5, go to Settings → Screen and Video → Video Output and set Resolution to Automatic or 2160p, and 120Hz Output to Automatic. If you want higher frame rates, turn on Performance Mode under Settings → Saved Data and Game/App Settings → Game Presets. For VRR (Variable Refresh Rate), enable it in Screen and Video → Video Output → VRR if your monitor supports it. These tweaks help your PS5 and monitor work together for the smoothest possible gameplay.
Xbox to Monitor Setup (Series X/S)
For a simple Xbox to monitor setup, connect an HDMI cable from the Xbox Series X/S HDMI OUT to the monitor’s HDMI IN, then choose that HDMI input on the monitor. Once you see the Xbox home screen, the core connection is done. This works the same whether you’re on a budget 1080p screen or a high-end 1440p/4K gaming monitor.
To set your refresh rate and resolution, go to Settings → General → TV & display options and choose the highest Resolution and Refresh rate your monitor supports (like 1080p 120Hz or 1440p 120Hz). For HDR, turn on Allow HDR and Auto HDR if your monitor supports it, so colors look richer. For audio, if your monitor has speakers, leave Audio → HDMI audio on Stereo uncompressed; if not, plug headphones into your controller or use external speakers for sound.
Nintendo Switch to Monitor
To connect a Nintendo Switch to a monitor, place the Switch in its dock, plug the dock’s HDMI OUT into the monitor’s HDMI IN, and then select that HDMI input. Once the dock light is on and the monitor is on the right source, you should see the Switch home screen. This is the easiest way to use a Switch with a monitor, and it works well for desks and dorm setups.
The Switch output is usually 1080p when docked, so don’t worry if your 4K monitor still shows it as 1080p—that’s normal and not a problem. If your monitor has no speakers, you can plug headphones into the Switch itself (if you play undocked) or into a controller or external audio device when docked. With this console-specific setup guide for Switch, you can enjoy Nintendo games on almost any monitor without digging through complex settings.
Optimize Your Gaming Performance
To optimize your gaming performance on a monitor, you need to match your console settings to what your screen can actually do. Once you’ve learned how to connect gaming console to monitor, these tweaks are what turn a “working” setup into a “wow, this feels smooth” setup. We’ll keep it simple: first fix your resolution and refresh rate, then cut input lag as much as you can. Think of this as fine‑tuning your gear so every match feels more responsive and clear.
Set Correct Resolution & Refresh Rate
To set the correct resolution and refresh rate, you want your console output to match your monitor’s best specs. The quick rule is: if your monitor is 1080p 60Hz, set the console to 1080p 60Hz; if it’s 1080p or 1440p 120Hz, turn on 120Hz in your console settings. This avoids scaling issues, weird black borders, and random blur that make the picture look worse than it should.
On PS5 and Xbox, open the display or screen settings and choose the highest resolution and refresh rate your monitor supports (like 1080p 120Hz or 1440p 120Hz). If your monitor is 60Hz only, leaving the console at 60Hz is fine; trying to force 120Hz will not help and can even cause “no signal” problems. Once your resolution and refresh rate match, you’re using your monitor to its full potential.
Reduce Input Lag
To reduce input lag, you want to remove anything that slows down the signal between your console and the screen. The easiest win is to turn on Game Mode on your monitor or in its picture settings; this cuts extra image processing that adds delay. If your monitor has options like motion smoothing, noise reduction, or heavy image “enhancements,” turn those off too.
On the console side, use a direct gaming console to monitor HDMI connection instead of running through extra devices like old receivers when you can. Keeping firmware updated on both your console and your monitor can also fix hidden timing and 120Hz issues. When you do all this, your controls will feel tighter and more instant, which is a big deal in shooters, fighting games, and any fast online play.
Troubleshooting – Fix Common Problems
This Troubleshooting – Fix Common Problems section is here for when you’ve plugged everything in, but something still isn’t right. Maybe the screen is black, the sound is gone, or the picture looks weird. Don’t panic—these issues are very common when people first learn how to connect gaming console to monitor. Go through the problems below one by one and match them to what you see.
No signal on monitor
If your monitor says “No signal,” it almost always means the wrong input is selected or the HDMI cable is not fully plugged in.
First, check that the HDMI cable is pushed in all the way on both the console and the monitor. A half‑plugged cable can look fine but give no picture.
Then, press the Input / Source button on your monitor and slowly cycle through the options (HDMI 1, HDMI 2, DP, VGA, etc.). Pause on each HDMI option for a few seconds to see if the console appears. If it still says “No signal,” try a different HDMI port on the monitor or a different HDMI cable if you have one. If you’re still stuck, you may also want to review our guide on What to Look for in a Gaming Monitor to be sure your screen fully supports your console setup.
HDMI not detected
If your console says something like “HDMI not detected” or “No HDMI device,” it means the console cannot see the monitor at all.
Turn off both the console and the monitor, unplug the HDMI cable from both sides, and then plug it back in firmly. Power the monitor on first, then the console.
If that does not fix it, try another HDMI port on the monitor or test the same cable and console on a TV to see if they work there. If the console works on a TV but not on the monitor, the monitor’s HDMI port or settings may be the problem—reset the monitor to factory settings from its menu and try again.
No sound issue
If you have a picture but no sound, the good news is your video connection is fine; you just need to sort the audio path.
First, check if your monitor actually has speakers. Many monitors do not, so you will never hear sound from them even if everything is connected right.
If your monitor does have speakers, turn the volume up on the monitor itself and make sure it is not muted in the on‑screen menu. On your console, go into Audio / Sound settings and make sure HDMI audio or TV/AV amplifier is selected. If the monitor has no speakers, plug headphones into your controller or connect external speakers to the monitor’s headphone jack or to an HDMI audio extractor.
Flickering screen
If your screen keeps flickering, going black for a second, or showing brief “No signal” messages, it is often a cable or refresh‑rate issue.
Start with the simple fix: try a different HDMI cable and make sure it is not bent or damaged. Short, good‑quality HDMI 2.0 or 2.1 cables usually give the most stable connection.
Next, lower the resolution or refresh rate in your console settings (for example, change from 4K to 1080p, or from 120Hz to 60Hz) and see if the flicker stops. Some older or cheaper monitors struggle with higher modes. You can also turn off any “overclock” or special gaming modes in the monitor’s menu to see if that helps.
Console stuck at low resolution
If your console is stuck at a low resolution, like 720p or 1080p, even though your monitor supports more, it’s usually a settings mismatch.
On your console, go to the Display / Screen settings and manually set the Resolution to the highest one your monitor supports (for most people, 1080p or 1440p). Turn the console off and back on after changing it to make sure it “handshakes” again with the monitor.
If you are using an HDMI to VGA or DVI adapter, remember that many of these are limited to 1080p or less, so 4K will not work through them. In that case, staying at 1080p is normal and not a fault in your how to connect gaming console to monitor setup.
120Hz not working
If you cannot get 120Hz to work, the first thing to check is whether your monitor really supports 120Hz on the HDMI port you are using.
On many monitors, 120Hz only works at certain resolutions (for example, 1080p 120Hz but not 4K 120Hz) or only on one HDMI port. Check the monitor’s manual or product page and make sure you are using the right port and resolution.
On your console, go to the display settings and set the Refresh rate to 120Hz and the Resolution to a mode your monitor supports at 120Hz. Use a good HDMI 2.0 or 2.1 cable and plug the console directly into the monitor, not through an old receiver or splitter. Once all three match—console, cable, and monitor—you should see 120Hz as an option and enjoy that smoother gameplay.
Advanced Setup Tips
These advanced setup tips are for when your basic “how to connect gaming console to monitor” setup is done, and you want a bit more. Maybe you own more than one console, or you want to stream with a PC and two screens. You don’t need to be a pro to do this; you just need to follow the paths step by step. Think of this as upgrading your desk from “simple setup” to “mini command center.”
Connecting Multiple Consoles to One Monitor
If you have a PS5, an Xbox, maybe even a Switch, and only one monitor, an HDMI switch is your best friend. An HDMI switch lets you plug several consoles into one box, then run a single HDMI cable from that box to your monitor. You then press a button on the switch to pick which console shows on the screen. This way you avoid crawling under the desk to swap cables every time you want to play something new.
To set it up, plug the monitor’s HDMI cable into the Output port on the HDMI switch. Then plug each console’s HDMI cable into the Input ports on the switch (Input 1, Input 2, Input 3, and so on). Turn on the monitor, turn on the console you want to use, and press the matching input button on the switch. If you play in 4K or at 120Hz, make sure the HDMI switch supports those modes so you don’t lose quality.
Dual Monitor Streaming Setup
If you want to stream your console games with a PC, a dual monitor streaming setup makes life much easier. The idea is simple: one monitor is for playing the game with no delay; the other is for your streaming tools, chat, and alerts. To do this, you use a capture card between your console and PC.
Here’s the basic path: console HDMI OUT → capture card HDMI IN → capture card HDMI OUT → gaming monitor. Then connect the capture card to your PC with a USB cable, install its software, and open your streaming app (like OBS). Your PC sees the capture card as a video source, while you still play on the monitor with normal response time. With this advanced setup tip in place, you can enjoy smooth gameplay on your monitor and run your full stream layout on the second screen without feeling any extra lag.
FAQ
Can you connect a gaming console to any monitor?
You can connect a gaming console to most monitors, as long as the monitor can take an HDMI signal. If the monitor has HDMI IN, your how to connect gaming console to monitor setup is simple: just use an HDMI cable. If it only has VGA, DVI, or DisplayPort, you may need an adapter, and some old office screens may not support high resolutions. Check the ports and the max resolution in the monitor’s specs before you buy cables or adapters.
Do monitors need speakers for consoles?
Monitors do not need speakers for consoles to work; they only need to show the picture. The console will still send sound over HDMI, but a monitor without speakers just cannot play it out loud. In that case, you can plug headphones into your controller, use small external speakers, or use an HDMI audio extractor. So even if your monitor is silent by itself, you can still have full sound in your setup.
Is HDMI 2.1 necessary?
HDMI 2.1 is not necessary for most people who just want 1080p or 1440p at 60Hz or 120Hz. HDMI 2.0 can handle 1080p 120Hz and even 4K 60Hz on many monitors. HDMI 2.1 only really matters if you are chasing 4K 120Hz on a PS5 or Xbox Series X and your monitor also supports HDMI 2.1. If your screen is 1080p or 1440p, a good HDMI 2.0 cable is usually more than enough.
Can Xbox output sound through monitor?
Yes, Xbox can output sound through your monitor if the monitor has built‑in speakers or a headphone jack. Just connect the Xbox to the monitor with HDMI, then in Settings → Audio, keep HDMI audio set to Stereo uncompressed. Turn up the volume in the monitor’s menu and you should hear game audio. If the monitor has no speakers or jack, use headphones on the Xbox controller or external speakers instead.
Why won’t my PS5 show 120Hz?
If your PS5 will not show 120Hz, it’s usually because the monitor or the settings do not match. First, make sure your monitor actually supports 120Hz on HDMI at the resolution you picked (often 1080p or 1440p). Then, on PS5, go to Settings → Screen and Video → Video Output and set 120Hz Output to Automatic. Also remember that not every game supports 120Hz, and cheap HDMI cables, adapters, or older HDMI ports can block that mode.
Can I use DisplayPort instead of HDMI?
Consoles only send video out over HDMI, not DisplayPort. If your monitor only has DisplayPort, you can use an active HDMI‑to‑DisplayPort adapter that is made for consoles, but not all adapters work well. For a smooth how to connect gaming console to monitor setup, a monitor with HDMI IN is always the easiest path. If you must use DisplayPort, read the adapter specs carefully and make sure it supports your console’s resolution and refresh rate.
Conclusion
To wrap up, the easiest way to get this working is simple: HDMI is the best method. If both your console and monitor have HDMI, just connect HDMI OUT on the console to HDMI IN on the monitor, pick that input, and you’re done. That is the clean, reliable core of how to connect gaming console to monitor for most people.
Before you start a long game session, make sure you ensure an audio solution that suits your setup, whether that’s speakers in the monitor, headphones in the controller, or a small external speaker. Then match refresh rate and resolution in your console settings to what your monitor can really do, so the image looks sharp and smooth with no strange blur or borders. A minute spent here will often fix things that feel “off” but are not actually broken.
Finally, take a moment to optimize settings for best experience: turn on Game Mode, turn off heavy image effects, and keep your console and monitor updated. Once all of that is in place, your setup stops feeling like “just a screen” and starts feeling like your own small gaming zone. Now that you know how to connect gaming console to monitor from start to finish, you’re ready to plug in, sit down, and enjoy your games with full confidence.